
Your First Timeline Show
Lay a scene and an audio track on the timeline and run them together.
The timeline plays scenes and audio along a fixed time axis, which allows for precise pre-programming of light shows. This guide walks you through building a short timeline with one scene and one audio file.
Prerequisites
- At least one scene. If you don't have one yet, make it in Getting Started.
- An audio file, if you want to sync to music. The timeline works fine without one.
Open the timeline
In the top toolbar, click Select Layout and choose Timeline.
The Timeline fills the top left, the Scene List sits on the right with two timers above it, and the Stageview and Functions panels run along the bottom.
Add a lane
Timeline items sit on lanes. There is one lane by default, but you can add as many as you want. Lanes are useful for keeping different types of items separate, for example audio on one lane and scenes on another.
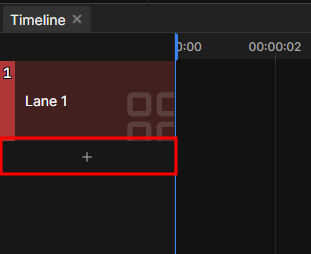
- Click Add a lane.
- Give it a name such as "Audio" and confirm.
You can drag lanes up and down to reorder them.
Place a scene
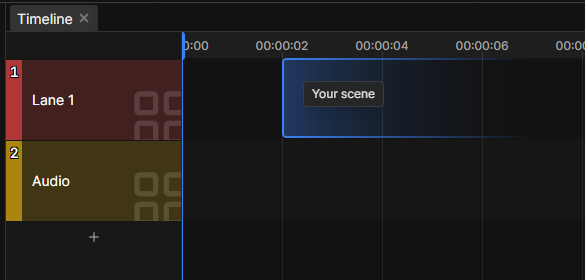
Drag a scene from the Scene List onto a lane. A scene item appears where you drop it.
- Drag the item's body to move it in time.
- Drag either edge to change how long it plays. (Dragging the left edge does not crop the scene.)
You can change the individual step durations and fades of a scene individually, and automate the scene opacity and speed. See Build a Timeline for a guide to those features.
Add audio
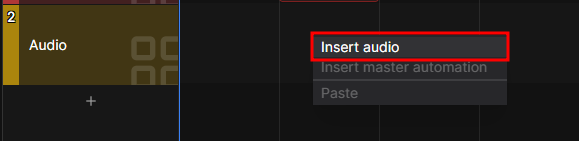
- Right-click a lane and choose Insert audio.
- Pick an audio file. Its waveform appears on the lane.
- Drag it so it lines up with your scene.
The timeline references audio files on disk rather than copying them into the project. If you move a file, nextDMX can't find it anymore. Use Export project when you move a show to another computer, that bundles the audio.
Play it back
The transport buttons sit in the timeline toolbar. From left to right:

- Skip to start and Previous jump the playhead backwards.
- Play / Pause is a single button that toggles the playback state.
- Stop stops playback and resets the playhead.
- Next and Skip to end jump forwards.
- The (strikethrough) Eye button toggles the automatic following of the playhead. When on, the timeline scrolls to keep the playhead in view.
- The Eye with lines or corners button toggles wether the follow mode keeps the playhead centered or just in view. Press play and the timeline starts running.
With the Timeline as the active panel, Space plays and pauses. Click anywhere on the top where the time indicators are to move the playhead. You can also drag the playhead to scrub through the timeline.
Moving around the timeline
Once a show grows past a few seconds, you'll spend a lot of time navigating it. Two things get you everywhere:
- Zoom with Ctrl and the mouse wheel.
- Scroll sideways with the scrollbar below the lanes, or hold Shift while using the mouse wheel.
- While holding right mouse button, drag to pan the timeline.
Items snap while you drag them:
- Items snap to the start and end of every other item and to the playhead, across all lanes. A thin line marks each point you snapped to.
- Hold Shift while dragging to switch snapping off and place an item freely.
Hold Ctrl or Shift while clicking items to select several at once, then move them together. Clicking an empty spot clears the selection. Right-click an item to open a context menu with more options.
Where to go next
- Build a Timeline covers alpha automation, step-timing overrides and speed automation.
- See Timeline Reference for a full description of the timeline panel and its features.