
Patch Fixtures
Add fixtures to your project and give them DMX addresses.
Patching tells nextDMX what fixtures you have and where they sit in your universes.
Patch a batch
- Click Select Layout and choose Patch.
- In the Patch panel's toolbar, click Patch fixtures.
- Search for your fixture and pick the manufacturer, model and mode.
Not every fixture is shipped with nextDMX. If you can't find yours, you can create a custom fixture definition. See Create a Custom Fixture for instructions. You can also request a fixture on the nextDMX Discord.
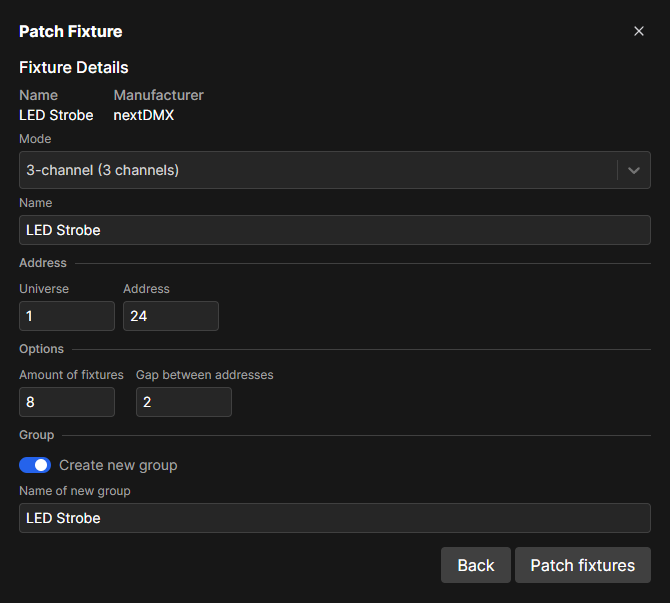
- Set the options for the batch:
- Universe and start address for the first fixture.
- Number of fixtures to patch at once.
- Address gap to leave space between fixtures.
- Create new group to collect the batch into a group.
- Click Patch fixtures.
Pick the right mode
A fixture's mode decides how many channels it uses and what each one does. Patch it in the mode the fixture itself is set to, otherwise channels might be misassigned. If you are unsure, check the fixture's own menu before patching.
Re-address a fixture
Select a fixture in the patch and edit its address. If two fixtures end up sharing addresses, a warning appears in the patch panel. You can still patch them, but they will interfere with each other.
Where to go next
- Organize with Groups and Folders
- Set Fixture Values
- See Patch Reference for a full description of the panel.