
Build a Timeline
Arrange scenes and audio on a timeline and automate them over its length.
This guide covers building a timeline and the per-item automation that allows you to deeply customize individual items. For a first walkthrough, see Your First Timeline Show.
Set up the timeline
- Click Select Layout in the top toolbar and choose Timeline.
- Pick a timeline in the selector at the bottom left, or create one there.
- Click Add a lane and name it. Add a second lane to keep audio and scenes apart.
- Drag a scene from the Scene List onto a lane.
- Right-click a lane and choose Insert audio to add music.
Automate a scene item
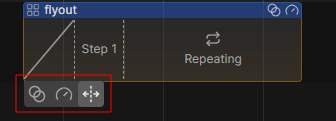
Hover a scene item to reveal its tools.
On scene items,
- the leftmost tool is Scene alpha, which automates the scene's opacity over time.
- The second tool is Effect speed, which automates how fast the item's effects run.
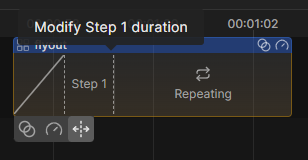
- The third tool is Step timing, which overrides the fade and wait times of the scene's steps, for this item only.
Scene alpha
Sets the item's level over time. Draw it down at the ends to fade in and out, or drop it in the middle to dim a look. This is the fastest way to blend two scenes into each other on separate lanes.
If you right-click the item and choose Only fade intensity, only the intensity channels of the scene are affected by the alpha curve. Color and position channels are left alone.
Step timing
Overrides the fade and wait times of the scene's steps, for this item only. The scene itself is untouched, so the same scene can run tight in one spot and slow in another.
Effect speed
Automates how fast the item's effects run across the item. Ramp it up to accelerate an effect. Effects that are timed in beats ignore this, so they stay locked to the tempo.
The range is 0.1x to 10x. The default is 1x, which runs the effect at its normal speed. It is recommended to edit this curve in the full curve editor, which gives you a larger canvas and precise point values.
Edit curves in detail
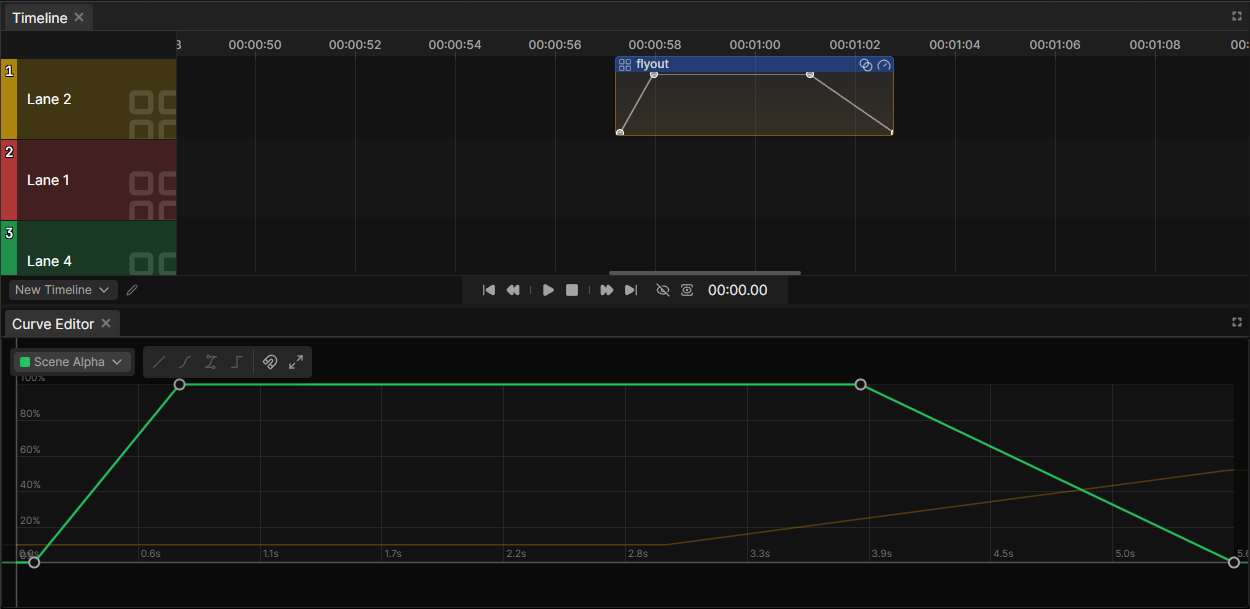
Right-click an item and choose Open in curve editor. The full editor gives you a larger canvas, precise point values and interpolation options such as smooth and bezier. A selector in the top left switches between the curves the item offers, for example its alpha and its effect speed.
The curve editor is shared between all items, so you can switch between them without closing the editor. Simply select a different item in the timeline and the editor updates to show its curves.
Where to go next
- Timeline Reference describes every part of the panel.
- Curve Editor Reference describes every part of the curve editor.