
Map MIDI and Keyboard
Drive scenes, masters and functions from a MIDI controller or the keyboard.
Control Mapping connects physical controls to actions. A mapping links one or more controls to one or more targets, and both sides can be mixed freely.
Set up a MIDI device
MIDI devices connect to the machine the kernel runs on. Open Settings → MIDI.
- Click New Device and name it.
- Open it and pick the Input Device. Pick an Output Device too if the controller has LEDs or motor faders.
- Add the controls you need with Button, Fader and Encoder.
- For each one, press Learn and do what the prompt says on the hardware.
Learn captures the note and channel for you, so you never have to look up MIDI numbers. A button asks for a push and a release, an encoder for a turn each way, a fader for a move.
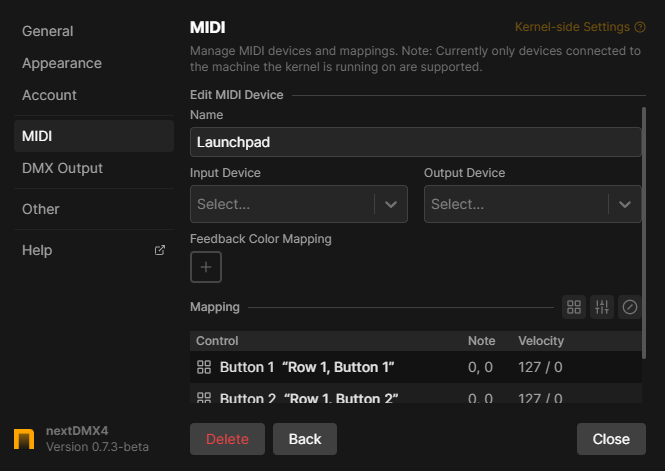
Name the controls after their position on the hardware, for example Row 1 Button 3, not after what they do. The same device usually ends up driving
different things in different projects.
Using Feedback Color Mapping you can set the color of the feedback LED on RGB controllers. This way you can easily select it in the mapping later.
There is currently no way to save and load MIDI device definitions. The
MIDI settings are stored in the Kernel config, located in the
nextDMX4-Kernel folder in your user home directory. If you want to move a
show to another computer, copy the config file too.
Create a mapping
Open Project Settings → Control Mapping and click New Mapping.
- Under Controls, click Add control and pick your MIDI button, MIDI fader or a keyboard key.
- Under Targets, click Add target and choose what it should do.
It works immediately. If the two sides do not fit, for example a fader on a target that only takes button presses, the row turns yellow and tells you.
Light up a button with feedback
For controllers with LEDs, turn on Send feedback on the MIDI control and mark one target as the feedback source with Set as feedback source. (The first target is used by default.)
The button then follows the state of that target, so a scene button lights while its scene runs.
Use layers for more than one job
A controller has a fixed number of buttons and a show usually needs more. Layers solve that:
- Create a layer with New Layer.
- Put the mappings for one song or one mode into it.
- Add a mapping in the global layer that toggles the layer.
Switching the layer changes what every button in it does at once.
Keep the layer switching mappings in global. Putting them inside a layer can leave you in a state where no button gets you back out.
Keyboard notes
A keyboard control binds a single key. Keys 0 and 1 through 7 are reserved for selecting Function Groups, so build your mappings on other keys.
Some keys are used by hotkeys sometimes, so they might work unreliably.
Where to go next
- Targets lists everything a mapping can drive.
- Controls lists everything a mapping can listen to.
- Mapping Layers Reference
- Build a ControlDeck for an on-screen version.